How I Created My POPPING E-BOOK COVERS
//QUICK DESIGN THREAD//
Bookmark this! You Can Use it For Your Next Ebook
RT for More Beginner Design Tips!!!
//QUICK DESIGN THREAD//
Bookmark this! You Can Use it For Your Next Ebook
RT for More Beginner Design Tips!!!
Here is a STEP BY STEP tutorial of how these POPPING 3D TEXT EFFECTS were created.
You will need:
Adobe Illustrator
You will need:
Adobe Illustrator
Step 1: Create your file (duh)
In this case I will be using 1080 x 1080 - but your dimensions will differ depending on the e-book!
In this case I will be using 1080 x 1080 - but your dimensions will differ depending on the e-book!
Step 2: Add your Text
Create the text, whatever you want! As for the font, I almost always use Bebas.
Create the text, whatever you want! As for the font, I almost always use Bebas.
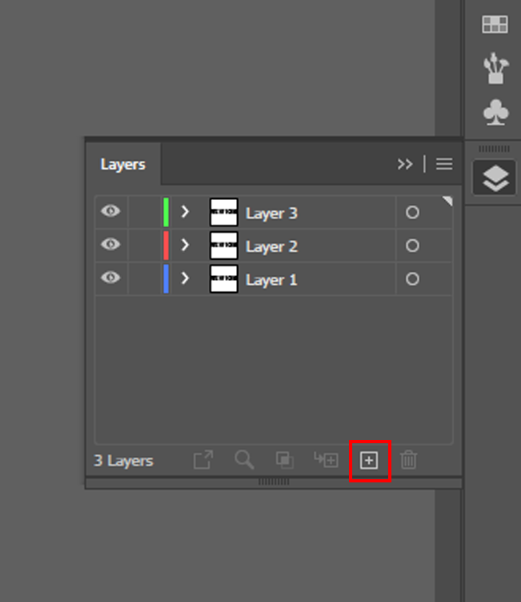
Step 3: Create 3 New Layers
Now, create 3 new layers. Then, copy & paste the text onto each of the layers
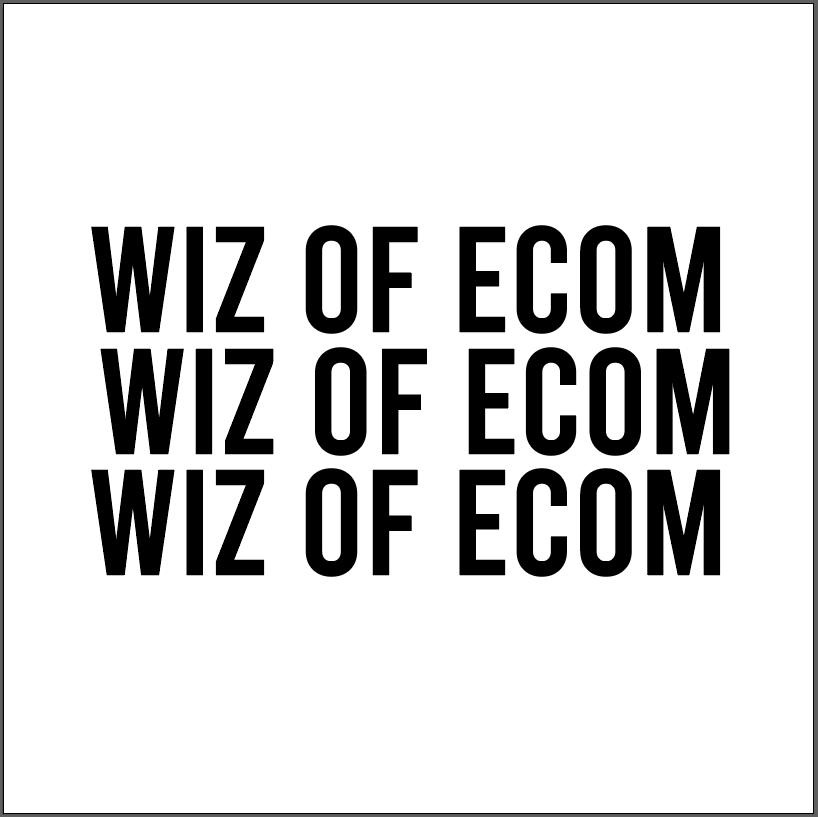
You should have something like this so far.
Now, create 3 new layers. Then, copy & paste the text onto each of the layers
You should have something like this so far.
Step 4: Name Your Layers
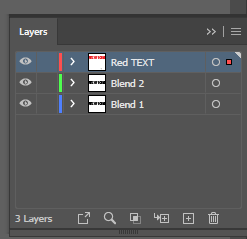
You should have 3 layers each with the same text.
You may have trouble following along so rename your text layers accordingly. (I changed the top text color to red)
You should have 3 layers each with the same text.
You may have trouble following along so rename your text layers accordingly. (I changed the top text color to red)
Step 5: Placement of Text
Now, take the ‘Red TEXT’ & place it directly on top of ‘Blend 2’
Now, take the ‘Red TEXT’ & place it directly on top of ‘Blend 2’
Step 6: So close!
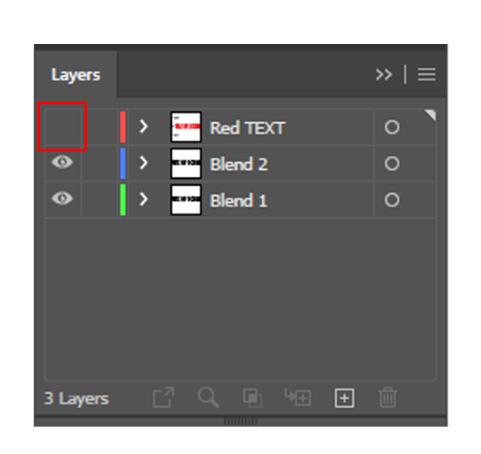
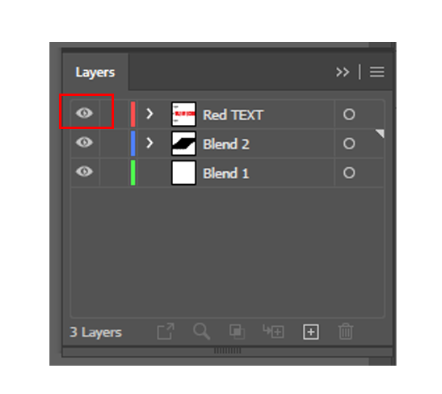
Make the red text layer invisible for now.
Take the Blend 1 layer and move it to the bottom left of the screen, make sure it’s off the artboard
Make the red text layer invisible for now.
Take the Blend 1 layer and move it to the bottom left of the screen, make sure it’s off the artboard
Step 7: Blending
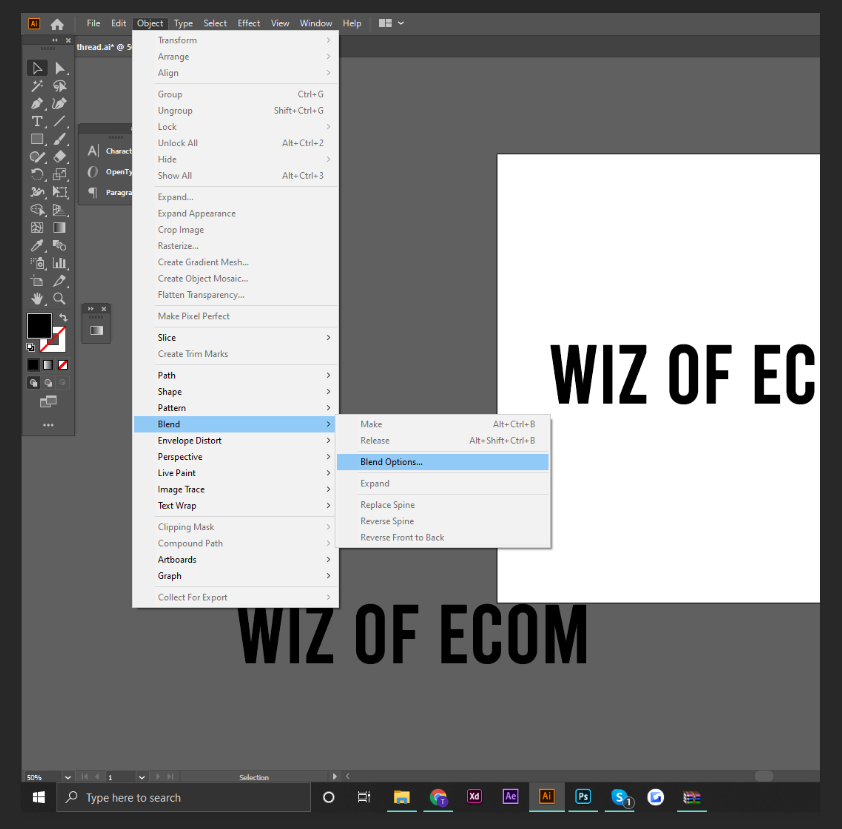
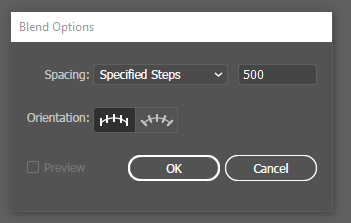
Then, go to the top panel and select “Object> Blend> Blend Options” & insert the settings I have
Click ‘OK’ when done
Then, go to the top panel and select “Object> Blend> Blend Options” & insert the settings I have
Click ‘OK’ when done
Step 8:
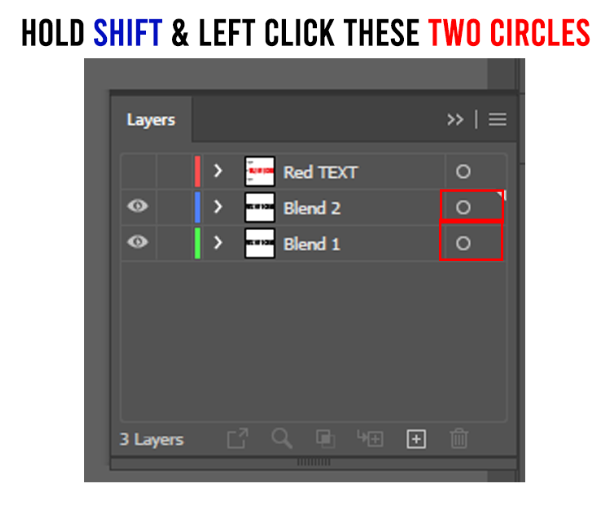
So close! Hold shift & left click the two circles as shown on the image!
Then, when those two layers are selected. Press “ALT+SHIFT+B”
OR
Go to “ Object> Blend> Make”
So close! Hold shift & left click the two circles as shown on the image!
Then, when those two layers are selected. Press “ALT+SHIFT+B”
OR
Go to “ Object> Blend> Make”
Step 9: Complete!
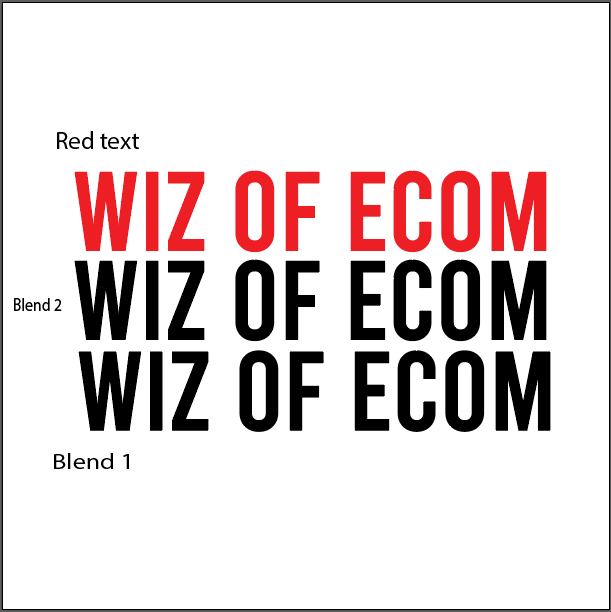
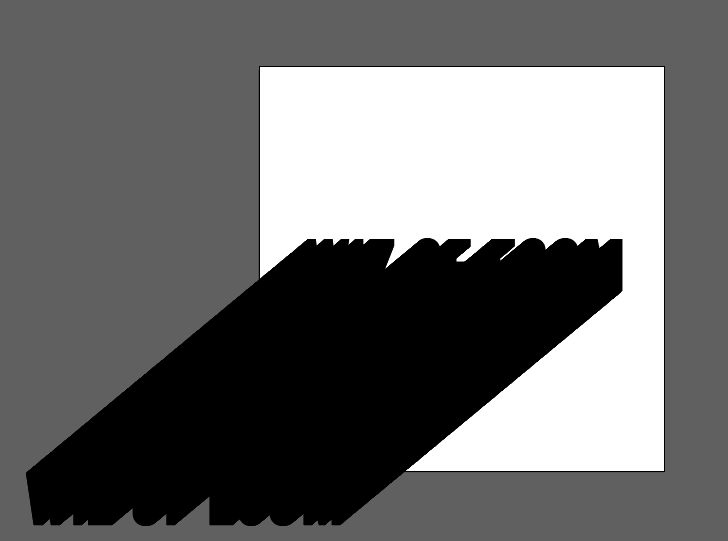
Now, your artboard should look like this.
All you need to do now is make the red text layer visible!
Now, your artboard should look like this.
All you need to do now is make the red text layer visible!
The eCom Wizards Mastermind forum is almost here
Sign up here and get your
FIRST 30 DAYS FREE
Join the hundreds of others who have already signed up


 https://earlybird.wizofecom.com
Sign up here and get your
FIRST 30 DAYS FREE
Join the hundreds of others who have already signed up


 https://earlybird.wizofecom.com

 Read on Twitter